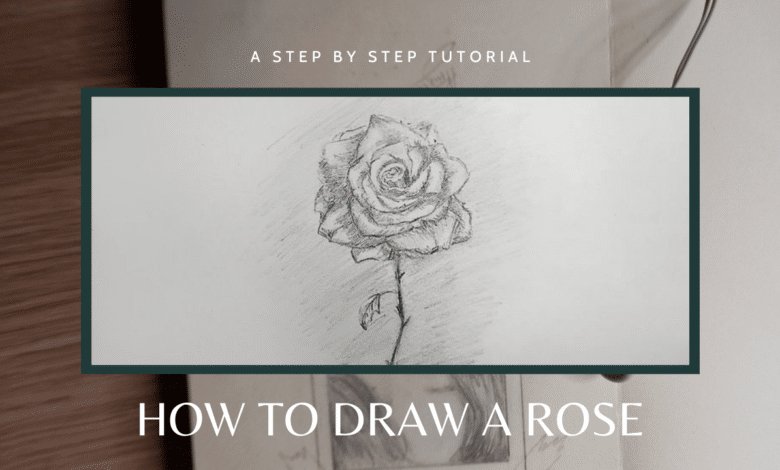
Drawing a rose, sunflower, or flowers in general, is not as complicated as it may seem at first glance. As a beginner, any drawing may seem intimidating, but let me assure you that learning how to draw and learning how to draw a rose can be a fun process.
Drawing a rose is not very difficult and does not require any special abilities. All you need is patience and the desire to learn. By the end of this article, you’ll be able to draw a rose step-by-step — even with no drawing experience!
How to draw a rose for beginners? – An easy tutorial
What you will need:
In order to follow this simple tutorial on how to draw a rose, you’ll need:
- A piece of paper
- An HB2 pencil (preferably Staedtler brand, but not necessary)
- A ruler
- A good quality eraser (preferably Staedtler brand, but not necessary)
- A pencil sharpener (just in case)
Have you gathered everything in front of you? Are you ready to learn how to draw a rose? Let’s start drawing!
Step 1: Draw a line
Take your sheet of paper, pencil, and ruler, and start by drawing a six-centimeter line in the center of the paper.
Try not to press too hard with your pencil, as this is just a guideline to help us draw our rose. We will erase it later.

Step 2: Define the size of your rose
Draw a rough circle around your line. We’ll start drawing our rose inside this circle.

![How To Draw a Rose for Beginners? [An Easy Tutorial] 2024 Slide](wp-content/plugins/revslider/public/assets/assets/dummy.png)


Step 3: Start drawing the petals
In the center of your line and circle, draw a small oval shape as your starting point. Next, draw curved lines to form the petals of your rose fanning out from the oval shape.

Step 4: Continue drawing the main lines that will form the rose shape
Continue drawing the main lines that will form your rose shape. Before adding detail to a drawing, drawing the baselines, meaning the basic lines that form our drawing, is very important before adding details like shadows and contrast, etc.

Step 5: Darken the main lines
Once you’ve completed drawing the first set of baselines, apply a little pressure to your pencil to darken the lines that form our petals. So far, we’ve just sketched our rose, but when you see that your rose is starting to look good, erase the original guideline from step 1. Then, start to create contrast and value by darkening the main lines of your petals. This will help make your rose image look more like a drawing and less like a rough sketch.

![How To Draw a Rose for Beginners? [An Easy Tutorial] 2024 Slide](wp-content/plugins/revslider/public/assets/assets/dummy.png)


Step 6: Shade your rose
Start to add shadows by adding light lines as shown in the picture below. This will make your petals appear more three-dimensional. Next, you’ll want to soften those lines by using a blending technique. When blending, use your finger, or if you prefer, a blending pencil, tissue, or paintbrush can also work.

Step 7: Add more details to your drawing
Continue to darken the shadows on your petals by lightly rubbing the tip of your pencil in the places you’ve already shaded.
You can also add highlights to your drawing to create contrast against your dark shadows. Think about where light would hit the petals and then take a small eraser and erase some of the pencil marks allowing the white paper to show through. It will make your drawing appear more realistic.

Final step: The finishing touches
Now that you’ve completed the flower, let’s finalize this drawing by adding the stem and a few touches to perfect this rose. To create a stem, draw a jagged line, as I’ve shown below. If you’d like, you can also add thorns and leaves too.

![How To Draw a Rose for Beginners? [An Easy Tutorial] 2024 Slide](wp-content/plugins/revslider/public/assets/assets/dummy.png)


If you want, you can also add a light background effect, as seen below.

Final Words
Congratulations, you just drew your first realistic rose! As you experienced, learning how to draw a rose is not as complicated as it may seem. In just eight simple steps, you were able to draw your own rose.
Drawing is not hard. The real trick is to have both the will to learn and a way to learn it. If you’re willing to learn how to draw and put in the necessary effort, you can learn to be a great drawing artist. Take the next step by learning how to draw other flowers and learn how to draw in general as a beginner to become an amazing drawing artist.
For even better results, watch my video!
To make it even easier to follow along, here is my step-by-step video on how to draw a realistic rose:
![How To Draw a Rose for Beginners? [An Easy Tutorial] 2024 Slide](wp-content/plugins/revslider/public/assets/assets/dummy.png)


